Hoop Wall Art: Turn Embroidery Into Decor
There are eleven embroidery hoops hanging on my bedroom wall right now.
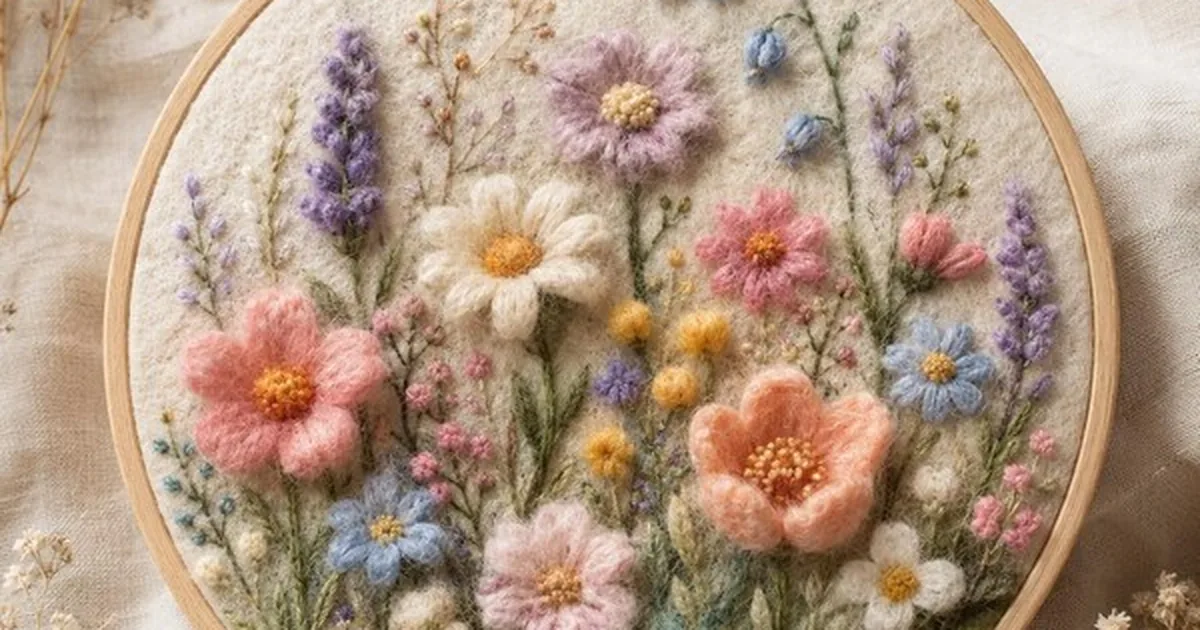
It started with one (a 20 cm hoop with a simple wildflower bouquet I’d stitched to use up leftover threads), and guests kept asking where I’d bought “those prints.” When I said I’d stitched them, the disbelief was so satisfying that I kept going. Hoop wall art is the purest form of embroidery-as-decor: no garment fitting, no washing, no functional constraints. Just a circle of fabric, whatever’s in your head, and a nail in the wall.
This post shares everything: choosing hoops and fabrics, designing compositions that actually look good in a circle, the stitches that photograph well, and how to finish the back so your art looks professional from every angle. I’ve made and hung dozens; the lessons below are the distilled version.
Why Hoop Art Works So Well as Decor
The circle is doing half the artistic work for you. A round frame turns even simple stitching into something that reads as intentional art, it’s the same reason photographers love a vignette.
Hoops are also cheap (PKR 250–500), the projects are small enough to finish in a weekend, and a grouping of three to five hoops fills a wall that would need a PKR 8,000 painting. My eleven-hoop wall cost less than one framed print and gets more comments than anything else in the house.
There’s a practical advantage too: hoop art never gets washed, sat on, or worn. Your stitching stays exactly as you left it for decades. This makes it the ideal place to try delicate techniques (fine silk shading, dense French-knot fields, metallic threads) that would never survive on a garment.
Materials: Hoops, Fabric, and Finishing Supplies
| Material | Specification | Notes |
|---|---|---|
| Embroidery hoops | Wooden, screw-tension; 13, 15, 18, 20, 23 cm | A set of graduated sizes makes the best wall groupings |
| Base fabric | Medium cotton, linen, or calico; cut 8 cm larger than hoop | Natural, unbleached tones photograph best |
| Thread | Stranded floss, perle cotton, or silk | The one place to splurge on variegated/specialty threads |
| Needles | Crewel #7–9 | Match to thread weight |
| Felt for backing | Wool or acrylic felt, hoop-sized circles | Covers the back neatly |
| Craft glue / hot glue | For securing backing | Small amount; keep away from the stitched area |
| Ribbon or twine | For hanging | Optional; sawtooth hangers work too |
On hoops: sand the inner edge lightly with fine sandpaper before use. Cheap wooden hoops often have splinters or rough spots that snag fabric and thread — two minutes of sanding prevents mysterious thread breaks mid-project.
And tighten the screw firmly; hoop art lives under tension permanently, and a loose hoop lets the fabric sag over months. I check my wall hoops’ tension once a year, like tuning an instrument.
Designing for the Circle: Composition Rules
A circle has no corners and no top or bottom until you hang it, which changes how you compose. These are the rules I follow:
Rule 1: Anchor the centre or the edge, never both equally
A design with a strong central medallion AND a heavy border fights with itself.
Choose: either a central motif with breathing space around it (botanical sprigs, a moon, an initial), or an edge-hugging design with an empty centre (a wreath, a ring of text). My most-liked piece is a 20 cm hoop with a single large protea in the centre and nothing else, the negative space is the design.
Rule 2: Let elements bleed off the edge
Stems, branches and landscapes that run past the hoop’s edge look abundant and natural; elements floating in the middle with margins all around look timid.
When I stitch a wildflower bouquet, the stems always exit the bottom of the circle and the tallest flower always touches the top edge. The hoop becomes a window, not a container.
Rule 3: Odd numbers and triangles
Three flowers beat two; five sprigs beat four. Arrange elements on an invisible triangle, it creates movement that a symmetrical row lacks. This is basic art composition, but beginners stitching their first hoop tend toward rigid symmetry, which reads as stiff on a wall.
Rule 4: Plan the grouping, not just the hoop
Hoops are almost always hung in groups.
Before stitching, decide the grouping: I plan in threes or fives, mixing sizes (e.g., 23 + 18 + 15 cm), with one “hero” hoop (detailed, colourful) and the rest quieter (monochrome sprigs, simple textures). Repeat one colour across all hoops in the group, that single echo is what makes separate pieces read as a set.
Five Hoop Designs, Easiest to Most Ambitious
| Design | Hoop size | Stitches | Time | Skill |
|---|---|---|---|---|
| Monochrome botanical sprig | 15 cm | Stem, lazy daisy | 2–3 hrs | Beginner |
| Wildflower bouquet | 20 cm | Stem, lazy daisy, French knot, satin | 6–8 hrs | Confident beginner |
| Embroidered quote/initial | 18 cm | Backstitch, stem | 3–5 hrs | Beginner |
| Floral wreath | 23 cm | Stem, lazy daisy, French knot, fishbone | 10–14 hrs | Intermediate |
| Thread-painted landscape | 20 cm | Long-and-short, satin, stem | 15–25 hrs | Advanced |
Start with the monochrome sprig. One colour, two stitches, one evening — and it teaches you the most important hoop-art skill: placing a design well in a circle.
My first sprig hoop (dusty blue eucalyptus on natural calico) still hangs in my hallway; the thread-painted mountain sunset I laboured over for three weeks hangs in the bedroom where fewer people see its wobbly horizon line. Start simple, hang proudly.
Stitching Tips Specific to Hoop Art
- Stitch in the hoop you’ll hang. Moving finished work to a “display hoop” distorts it. Buy a separate working hoop if you must, but the piece should live its whole life in one hoop.
- Keep the fabric grain straight. A crooked grain line is invisible in a working hoop and glaringly obvious on a wall. Align the fabric’s weave with the hoop’s screw at the top before tightening.
- Work the background first. Stems before flowers, sky before mountains, wreath vine before blooms. Same principle as painting: back to front.
- Mind the hoop’s inner edge. Keep stitching 1.5 cm clear of the inner hoop edge. Stitches crushed under the hoop ring look dented permanently, and you can’t reposition them later.
- Photograph as you go. A phone photo reveals composition problems your eyes miss, lopsidedness, a gap you didn’t see, colours that clash. I photograph every hoop at the halfway point and almost always adjust something.
Finishing the Back: The Professional Touch
The back of hoop art is seen, when it’s lifted off the wall, when light hits it at an angle, when a curious guest peeks. A raw gathered back with a visible screw looks unfinished. Here’s my method:
- Trim the excess fabric to 4 cm all around the back of the hoop.
- Run a gathering stitch (long running stitch) around the fabric edge, pull gently to cinch it toward the centre, and knot. The back should be smooth-ish, not lumpy, trim more fabric if it bunches.
- Cut a circle of felt 1 cm smaller than the hoop’s outer diameter. Apply a thin ring of craft glue to the felt’s edge and press it over the gathered back, covering all raw edges. Let dry flat for an hour.
- Optional: stitch a small hanging loop of ribbon to the top back, or attach a sawtooth hanger. For heavy 23 cm hoops I use two small nails; for smaller ones, a single nail or even a removable adhesive hook holds fine (a finished 15 cm hoop weighs about 80–100 g).
Sign and date the felt backing with a fabric pen. Future you (or whoever inherits it) will be glad. My oldest hoop is dated 2021, and seeing the date reminds me how far my stitching has come.
Hanging and Arranging
Hang groupings with 5–8 cm gaps between hoops, closer reads as cluttered, farther reads as disconnected. Keep the centre of the grouping at eye level (about 150 cm from the floor).
For a hallway or stairwell, stagger heights following the stair angle. Avoid hanging embroidery in direct sunlight: cotton floss fades, and a hoop that took you 20 hours deserves better than a south-facing window. My sunniest wall holds only the pieces stitched in the most lightfast colours (indigos, dark greens); the pastels live in the hallway.
Mistakes I Made So You Don’t Have To
Mistake 1: I stitched right up to the hoop edge. The outer ring of flowers got crushed under the hoop’s inner lip and looks permanently dented. The 1.5 cm clearance rule exists because I violated it on hoop number two.
Mistake 2: I hung my first grouping in direct sun. A dusty-pink wreath faded to beige on one side within a year. Embroidery is textile art; treat it like you’d treat a watercolour, not a poster.
Mistake 3: I used the display hoop as a working hoop and over-tightened it. The screw stripped, the hoop wouldn’t hold tension, and the fabric sagged within months. Now: stitch in the display hoop but tighten sensibly, or use a cheap working hoop and transfer once, carefully, at the end.
Mistake 4: I made eleven hoops with no colour plan. My wall looked like a craft fair exploded until I restitched three backgrounds to introduce a repeated sage green. Plan the grouping’s palette before stitching hoop one, not after hanging hoop eleven.
Related guides
Embroidered Tote Bag Step-by-Step: From Canvas to Carry — for a tote from leftover fabric; Needles, Hoops & Frames: Complete Tool Guide — for choosing the right hoop.
Frequently Asked Questions
Do I need to wash the fabric before stitching hoop art?
It’s less critical than for garments (no body, no further washing), but I still pre-wash: it removes sizing that makes the fabric stiff and reveals the true colour. One exception — if you’re using water-soluble pens for marking, pre-washing is mandatory anyway to rinse the marks at the end.
How do I transfer a design onto the fabric in the hoop?
Three methods, easiest first: draw freehand with a water-soluble pen (fine for organic designs); trace using a lightbox or sunny window with the design printed on paper beneath the fabric; or use iron-on transfer pens for precise work. For hoop art I mostly draw freehand, the organic imperfection suits the medium.
Can I sell hoop art? Any tips?
Yes, it’s one of the most sellable forms of embroidery because it’s ready to hang. Price by time: at even a modest hourly rate, a 10-hour wreath in a nice hoop is worth far more than most beginners charge. Photograph in natural daylight against a plain wall, and always show the finished back, buyers of handmade check.
My fabric keeps slipping in the hoop. Help?
Wrap the inner hoop with cotton twill tape or bias binding, it grips the fabric dramatically better. Also check the screw: if it’s stripped, replace the hoop. And never hoop over thick seam allowances or doubled fabric; the uneven thickness is what causes most slipping.
What’s the best way to dust hoop art?
A soft, dry paintbrush or a cool hairdryer from 30 cm away, every few months. Never use a damp cloth on the stitched surface — it can move water-soluble residues or dull silk threads. My eleven hoops get a five-minute brush-down twice a year.
Key Takeaways
- The circle does compositional work for you, but still follow the rules: anchor centre or edge, bleed elements off the edge, use odd numbers.
- Plan wall groupings in threes or fives with graduated sizes and one repeated colour.
- Stitch in the hoop you’ll display; keep the fabric grain straight and stitching 1.5 cm clear of the inner edge.
- Finish backs with gathered fabric and a glued felt circle, sign and date it.
- Keep hoop art out of direct sunlight; cotton floss fades.
- Start with a monochrome sprig: one evening, two stitches, a finished piece for the wall.
Eleven hoops, one wall, countless “you made that?!” moments. Hoop art is where I play, new stitches, odd colour combinations, designs too weird for a garment. Start one tonight: a 15 cm hoop, some calico, one colour of thread, and a sprig of whatever plant you can see from your window. By tomorrow you’ll have art.


