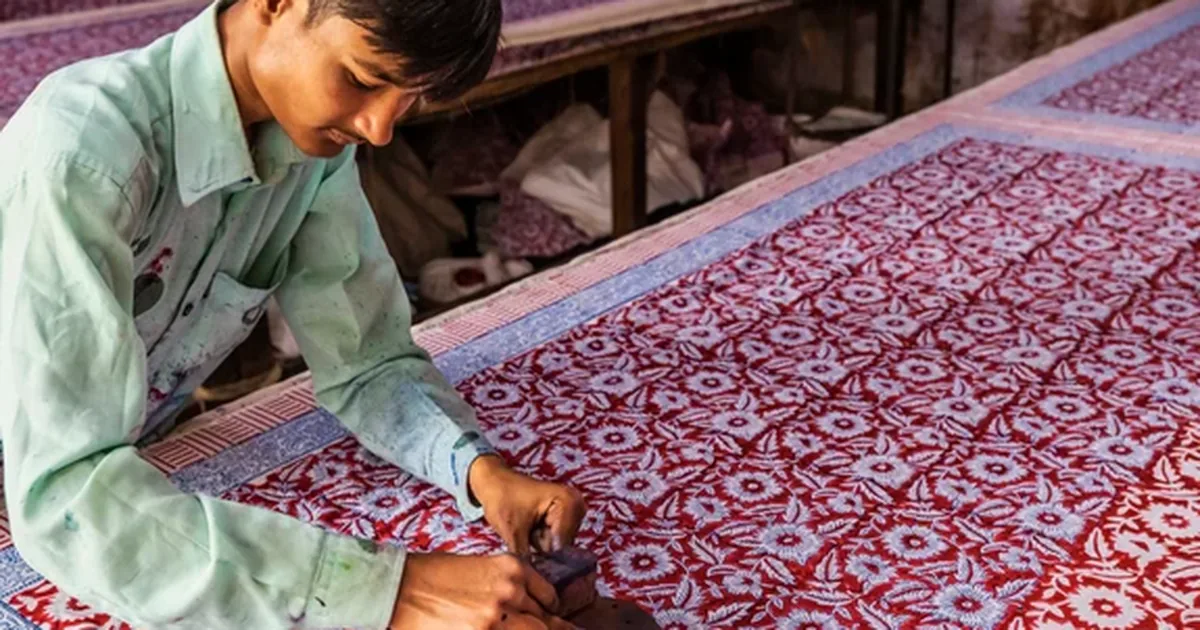
Block Printing Process: Complete Guide
I carved my first printing block on a rainy weekend with a set of lino cutters, a piece of soft pine, and wildly unrealistic expectations. The block was supposed to be a simple four-petal flower.
What came out looked, charitably, like a potato. But I printed it anyway (on a scrap of cotton, with fabric paint from a craft store), and when I lifted that ugly little block and saw a row of almost-flowers marching across the cloth, I understood instantly why people have been doing this for four thousand years.
Here’s you from that first potato-flower to genuinely good block printing: the tools, the carving, the fabric prep, the printing itself, and every mistake I made along the way so you don’t have to.
What You Need to Start
Blocks and carving tools
- Blocks: Beginners should start with soft, close-grained wood (pine or limewood) or even mounted linoleum, real sheesham rosewood is wonderful but punishing to carve. Buy one or two ready-carved blocks as well, so you can practise printing while your carving skills catch up.
- Carving tools: A basic lino cutter set with V-gouges and U-gouges (sizes 1–5) handles 90% of beginner work. Add a bench hook or non-slip mat, carving toward your hand is how injuries happen.
- Handles and sharpening: A small sharpening stone or strop. Dull tools slip; sharp tools cut where you tell them. This is the single biggest safety factor in carving.
Printing setup
- Fabric: Plain-weave natural fibres, cotton, linen, or silk. Pre-wash everything.
- Printing surface: A firm table padded with 2–3 layers of old blanket or felt, covered with a smooth cotton cloth. The padding is non-negotiable, it lets the block press evenly.
- Colour: Water-based fabric block-printing ink for beginners (easy cleanup, good results). Traditionalists graduate to pigment pastes mixed with binder.
- Trays: A shallow tray or tile with a thin, even film of ink. A small foam roller helps spread it uniformly — thick blobs print blobs.
- Extras: Masking tape for registration guides, scrap fabric for testing, rags, and a bucket of water for quick block rinsing.
Step 1: Designing for the Block
Block printing rewards bold simplicity. Fine lines under 2mm wide tend to fill in or break; intricate detail belongs to later, when your carving is confident. My design rules:
- Think in positive and negative space. What you carve away stays fabric-coloured; what remains prints. Beginners should sketch the design, then shade the parts to be carved away, it prevents the classic error of carving the wrong half.
- Design the repeat first. A block prints one tile of a repeating pattern. Draw your motif inside a square, then photocopy or trace it four times in a grid, do the edges flow into each other? Fix the tile before you carve.
- Include registration marks. Carve two tiny notches on opposite edges of the block; they print as dots that help you align the next impression.
- Start geometric. Stripes, dots, diamonds, simple florals, these teach pressure and alignment without punishing imperfect carving.
Step 2: Carving
- Transfer the design by drawing directly on the block with a soft pencil, or by gluing a paper printout face-down with a glue stick (the paper rubs away as you carve).
- Carve the outlines first with a small V-gouge, cutting away from your body and hands. Rotate the block, not your wrist.
- Clear the negative space with larger U-gouges. Carve to an even depth of about 2–3mm, shallow enough to stay strong, deep enough that cleared areas don’t touch the fabric.
- Test-print early and often. Ink the block and stamp it on scrap paper after every major carving pass. The print reveals problems your eyes miss — a ridge you didn’t clear, a line that’s too thin.
- Chamfer the edges slightly so the block’s rim doesn’t print an unwanted border line (the classic beginner tell).
Safety note I learned the hard way: clamp or brace the block. I’ve the scar to prove that holding a small block in your palm while pushing a gouge toward it’s a bad plan.
Step 3: Preparing the Fabric
Skipping this step is the number one cause of faded, patchy prints. New fabric carries sizing and oils that repel ink:
- Scour: Simmer fabric 1–2 hours in hot water with washing soda, then rinse thoroughly. (Full details in our Natural Dyes 101 guide, the chemistry is the same.)
- Dry and press so the fabric lies perfectly flat. Wrinkles print as white ghosts.
- Optional mordanting: For maximum wash-fastness with traditional pigment pastes, an alum mordant bath helps. With modern fabric inks, scouring alone usually suffices.
Step 4: Printing
This is the part that looks like magic and feels like rhythm:
- Lay the fabric on your padded table, smoothed flat, and tape a straight guideline for your first row.
- Ink the block: Roll a thin, even film of ink on your tile. Press the block into it with firm, even pressure, then check the block’s face. You want a uniform sheen, no puddles, no dry spots. Re-ink for every impression; “one inking does two prints” is how you get one good print and one ghost.
- Position and strike: Place the block on the fabric using your registration marks. Press down firmly with even pressure across the whole block. I press with both palms, then give it one solid tap with a rubber mallet. Rocking or shifting mid-press causes double images.
- Lift straight up. No sliding, no peeling at an angle. Straight up, clean.
- Repeat: Move to the next position, aligning registration marks to the previous impression. Work in rows, and step back every few impressions to check alignment, catching drift early saves the piece.
Multicolour printing
Each colour needs its own block and its own pass over the fabric. Print the lightest colour first, let it dry completely, then print the next.
Registration notches are essential here — and honestly, slight misregistration (a hairline of background between colours) looks charming and handmade, while perfect registration looks machine-made. Aim for close, not clinical.
Step 5: Curing and Finishing
A print that isn’t cured will wash out. The method depends on your ink:
- Water-based fabric inks: Air-dry 24 hours, then heat-set with a hot iron (through a pressing cloth) for 2–3 minutes per section. Then (and this matters) wait 72 hours before the first wash.
- Traditional pigment pastes: Dry in shade, then wash gently to remove excess paste, dry again, and press.
- First wash: Always alone, in cool water, with mild soap. A little colour in the rinse water is normal; handfuls of colour mean under-curing.
Troubleshooting
| Problem | Likely cause | Fix |
|---|---|---|
| Patchy, uneven print | Uneven inking or pressure | Roll ink thinner and more evenly; press with full palm weight |
| Blurred / bleeding edges | Too much ink, or fabric too thin | Less ink per impression; back thin fabric with paper |
| Faint “ghost” prints | Skipping re-inking | Ink the block fresh for every impression |
| Unwanted border lines | Block edges touching fabric | Chamfer block edges; carve deeper near rims |
| Misaligned repeats | No registration system | Use carved notches + taped guidelines; check every few prints |
| Print washes out | Skipped scouring or heat-setting | Scour fabric first; heat-set properly and wait 72h |
| Ink drying on the block | Working too slowly in heat | Rinse block periodically; work in shade |
Caring for Your Blocks
Good blocks last decades. Rinse them promptly after printing (dried ink in fine carving is miserable to remove), dry them away from direct sun so the wood doesn’t crack, and store them face-to-face with paper between, or standing on edge, never stacked face-down under weight.
Oil wooden blocks lightly once a year. And date them: I write the carving date on the back of every block, and looking at the progression from potato-flower to present day is one of my favourite things.
Key Takeaways
- Design for the medium: bold shapes, 2mm+ lines, and a repeat tile tested on paper before carving.
- Carve away from your hands with sharp tools; test-print on scrap after every major pass.
- Scour fabric before printing, sizing and oils are the top cause of failed prints.
- Re-ink for every impression, press evenly, lift straight up, and check alignment every few prints.
- Cure properly: air-dry, heat-set, and wait 72 hours before the first cool wash.
- Maintain blocks by rinsing promptly, drying in shade, and storing carefully, they improve with age.
Related guides
Artisan Spotlight: Inside a Block Printing Workshop — for the workshop behind the process; Thread Guide: Types, Weights & When to Use Each — for choosing printing threads.
Frequently Asked Questions
What wood is best for carving printing blocks?
Beginners: soft close-grained woods like pine or limewood, or mounted linoleum. Intermediate: harder fruitwoods. Traditional professional blocks use sheesham (rosewood) for its density and detail-holding, but it’s difficult to carve without experience and sharp tools.
Can I block print on dark fabric?
Yes, use opaque fabric inks formulated for dark grounds, and expect to apply slightly more ink per impression. Metallic inks on dark fabric are particularly striking. Test on a scrap first, as some colours shift on dark backgrounds.
How do I print a continuous pattern without visible seams?
Design the block as a true repeat tile (test with four traced copies in a grid), carve registration notches, and use taped guidelines on the table. Small misalignments read as handmade charm; large ones mean re-checking your tile design.
Is block printing washable?
Yes, when done properly: scoured fabric, appropriate ink or paste, full curing (heat-setting for modern inks), and a 72-hour wait before the first cool wash. Expect handmade prints to soften gently over years — that’s patina, not failure.
How long does it take to get good at block printing?
Printing decent single-colour repeats: one focused weekend. Carving clean blocks: a few weeks of practice. Confident multicolour registration: a few months. The learning curve is kind, every session produces something usable, which keeps you going.


One Comment