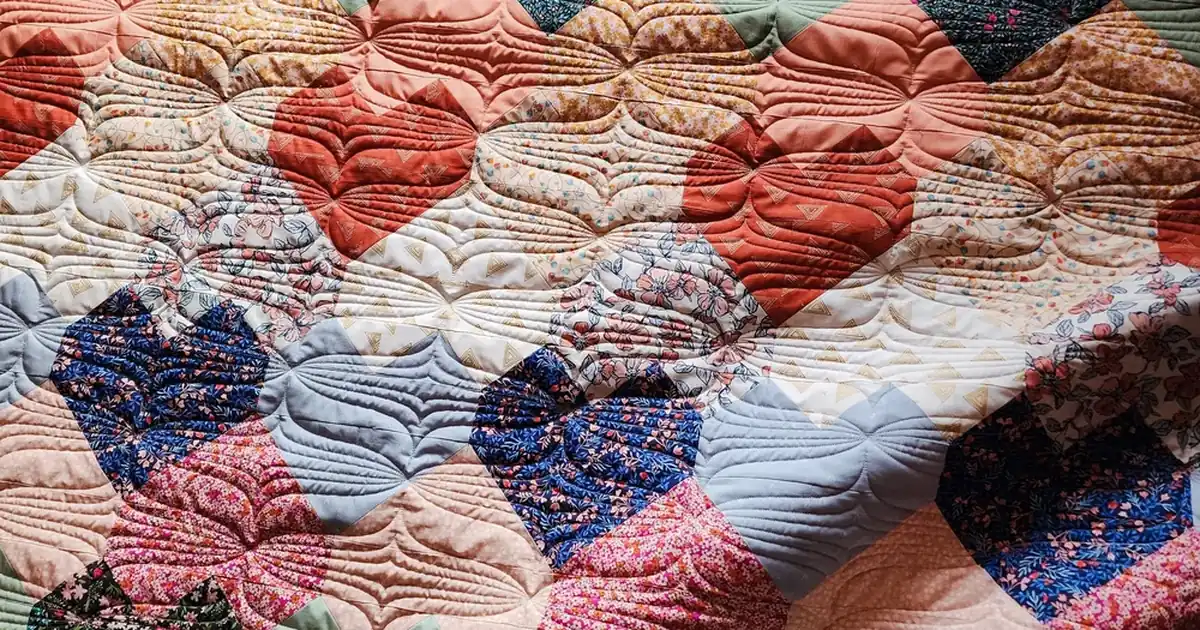
Beginner Quilt Project with Hand Stitching
Everyone told me not to hand-stitch my first quilt. “It’ll take forever,” they said. “Use a machine.” They were right about the time, my first quilt, a simple patchwork throw, took four months of evenings.
They were wrong about everything else. Hand quilting taught me more about fabric, patience and precision than any machine ever could, and the finished quilt has a softness and drape that machine-quilted pieces simply don’t have. When you wrap yourself in a quilt stitched entirely by hand, you feel every one of those hours as warmth.
This guide is for the beginner who wants to do it the slow way on purpose. We’ll make a small patchwork throw (120 × 150 cm, big enough to use, small enough to finish) with hand-pieced or machine-pieced squares and entirely hand-quilted stitching. Real measurements, real time estimates, and the mistakes from my four-month education.
Why Hand-Stitch a Quilt in the Age of Machines
Machine quilting is faster; nobody disputes that. But hand quilting produces a fundamentally different textile.
Machine stitches lock the three layers rigidly; hand running-stitches allow the layers to move against each other microscopically, creating a quilt that drapes like fabric rather than sitting like a mat. Antique quilts survived a century because of this flexibility, not despite it.
There’s also the entry cost: hand quilting needs a hoop or frame, needles, thread and fabric — under PKR 5,000 total. Machine quilting needs a machine capable of free-motion work, which is a different budget entirely.
And the rhythm of hand quilting (rocking the needle, pulling the thread, watching the pattern grow) is meditative in a way that feeds the soul of slow craft. My four months of evenings were not a cost; they were the point.
Project Plan: The 120 × 150 cm Patchwork Throw
| Component | Specification | Quantity |
|---|---|---|
| Finished quilt | 120 × 150 cm (throw/lap size) | 1 |
| Patchwork squares | 15 cm finished (cut 16.5 cm with seam allowance) | 80 (8 × 10 grid) |
| Backing fabric | Cotton, 130 × 160 cm | 1 piece |
| Batting (wadding) | Cotton or cotton-blend, 130 × 160 cm | 1 piece |
| Binding | 2.5-inch strips, total ~5.5 metres | Continuous strip |
Why 15 cm squares? They’re large enough to cut and piece quickly, small enough to look like proper patchwork, and the 8 × 10 grid gives pleasing proportions without a single partial square.
Eighty squares sounds like a lot until you realise each one takes about 3 minutes to cut and 5 to piece, the top comes together in a couple of weekends.
Materials: The Full List
| Material | Specification | Qty | Approx. cost (PKR) |
|---|---|---|---|
| Patchwork cotton | Quilting cotton, 5–8 coordinating prints/solids | 2.5 metres total | 1,500–2,500 |
| Backing cotton | Plain or simple print | 1.6 metres (wide) or pieced | 800–1,200 |
| Batting | Cotton or 80/20 cotton-poly, low loft | 130 × 160 cm | 1,200–1,800 |
| Quilting thread | Cotton quilting thread (stronger than floss) | 3–4 spools | 250–350 each |
| Quilting needles | “Betweens” size 8–9, short and strong | 1 pack | 200 |
| Quilting hoop/frame | 35–45 cm hoop or PVC floor frame | 1 | 800–2,000 |
| Thimble | Metal, with a dimpled top | 1 | 250 |
| Marking tools | Hera marker or chalk pencils | 1–2 | 200–400 |
| Rotary cutter, mat, ruler | 45 mm cutter, A2 mat, 15 × 60 cm ruler | 1 set | 2,500–4,000 |
The rotary cutting set is the one real investment, and it’s worth it: cutting 80 accurate squares with scissors takes an afternoon and invites error; with a rotary cutter it takes 40 minutes and every square is true.
Inaccurate squares compound across 80 pieces into a top that won’t lie flat, the cutter pays for itself in frustration saved. Everything else is inexpensive.
On batting: choose low-loft cotton for hand quilting. High-loft polyester batting is harder to needle and shifts under hand stitching. Cotton batting also “grips” the layers slightly, which keeps your quilt sandwich stable while you work.
Phase 1: Cutting and Piecing the Top (Weekends 1–2)
- Pre-wash all fabrics. Quilting cottons shrink 2–4%. Wash, dry and press everything before cutting, a quilt that puckers at the first wash because one fabric shrank more than its neighbours is heartbreaking.
- Cut 80 squares at 16.5 cm. The extra 1.5 cm is seam allowance (0.75 cm per side, the quilter’s standard “quarter inch” is 0.635 cm; I use 0.75 cm because it’s easier to measure in metric and the difference is negligible). Cut with the rotary cutter, stacking 4–6 layers.
- Arrange the grid. Lay all 80 squares on the floor in an 8 × 10 arrangement. Step back, look, rearrange until the colours balance — no two identical fabrics touching, darks and lights distributed. Photograph the layout; you’ll disturb it while sewing.
- Piece into rows. Sew squares into 10 rows of 8, right sides together, 0.75 cm seams, pressing seams alternately left and right per row (this nests the seams when rows join). Chain-piece: feed pairs through the machine one after another without cutting threads, it’s twice as fast.
- Join the rows. Pin at every seam intersection (nesting the pressed seams makes them lock together), sew, press. The completed top should measure approximately 121.5 × 151.5 cm and lie flat. If it ripples, check your seam allowances, inconsistent seams are the usual culprit.
You can hand-piece the top too (running stitch, backstitched at stress points), and purists do, but machine piecing is structurally identical and saves weeks. Save your hand-stitching hours for the quilting itself, where they show.
Phase 2: The Quilt Sandwich and Basting (Weekend 3)
Layering order on a clean floor: backing fabric right-side down, batting centred on top, patchwork top right-side up centred on the batting. Each layer should extend 5 cm beyond the top on all sides. Smooth from the centre outward, every wrinkle you leave now becomes a permanent tuck later.
Baste with large safety pins every 10–12 cm in a grid (about 150 pins for this size), starting from the centre. Pin basting is beginner-friendly and holds well for hand quilting. Remove pins as your stitching reaches them — never quilt over a pin.
Phase 3: Hand Quilting (Months 1–4, The Beautiful Part)
The stitch
Hand quilting is a running stitch through all three layers: needle down through top, batting and backing, then back up, loading 3–4 stitches on the needle before pulling through.
Aim for 6–8 stitches per 2.5 cm (about 3 per cm), even, not tiny. Beginners obsess over small stitches; experienced quilters obsess over even stitches. Even 4-per-cm stitching looks professional; uneven 8-per-cm looks amateur.
The technique
Wear the thimble on your middle finger under the quilt; push the needle down with the thimble, then rock it back up with your top hand. The classic “rocking” motion (down-up-down-up without repositioning your hands) is what makes hand quilting fast.
It took me three weeks to learn the rock; before that I was stab-stitching (push down, pull through, reposition) at a quarter of the speed. Practice on a 30 cm basted scrap sandwich first. I wish someone had told me that before I started on the real quilt.
Quilting designs for beginners
| Design | How | Effect | Difficulty |
|---|---|---|---|
| Stitch in the ditch | Quilt along every seam line | Defines the patchwork; subtle texture | Easy |
| Diagonal grid | Straight lines corner-to-corner across squares | Classic diamond texture | Easy |
| Echo/outlines | Quilt 1 cm inside each square’s edge | Puffed squares; lovely dimension | Easy |
| Simple motifs | Chalk-drawn hearts, leaves in plain squares | Personal, decorative | Medium |
For your first quilt: stitch in the ditch along all seams, then add a diagonal line across each square. It’s honest, attractive, and achievable. My first quilt used exactly this combination and it looks like a proper quilt, because it’s one.
Pacing
A 120 × 150 cm quilt has roughly 45–55 metres of quilting lines in the stitch-in-the-ditch-plus-diagonal plan.
At a beginner’s pace of 1–1.5 metres per hour, that’s 35–50 hours of quilting. An hour most evenings = 6–8 weeks; I averaged 45 minutes and took about 14 weeks. This is normal. Quilts are measured in seasons, not days.
Phase 4: Binding (The Finish Line)
- Trim the quilt sandwich square, leaving the batting and backing flush with the top’s edges.
- Join 2.5-inch (6.35 cm) strips into one continuous 5.5-metre binding strip (diagonal seams reduce bulk). Press in half lengthwise, wrong sides together.
- Machine-stitch the binding to the quilt front, raw edges aligned, 0.75 cm seam, mitring the corners.
- Fold the binding over the edge to the back and hand-slip-stitch it down, small, invisible stitches every 3–4 mm. This final handwork takes 3–4 hours and it’s the signature of a handmade quilt: no machine can turn a mitred corner as crisply as fingers can.
Mistakes I Made So You Don’t Have To
Mistake 1: I skipped the practice sandwich. My first 50 cm of quilting on the real quilt was stab-stitched, uneven, and visibly worse than the rest.
I unpicked it all — two evenings wasted. Practice the rocking stitch on a basted scrap for a week first. Your quilt deserves your tenth hour of practice, not your first.
Mistake 2: I used regular sewing thread for quilting. It broke constantly under the friction of three layers. Quilting thread is glazed and stronger, it’s engineered for exactly this. The price difference is trivial; the frustration difference is enormous.
Mistake 3: I basted too sparsely. Pins every 20 cm let the layers shift as I quilted, creating puckers I had to unpick. Every 10–12 cm is the rule. Yes, that’s ~150 pins. Yes, it’s worth it.
Mistake 4: I quilted in the wrong order. I started at one corner and worked across; by the middle, the unquilted half had shifted and bunched. Always quilt from the centre outward, it pushes excess fullness toward the edges where the binding absorbs it, instead of trapping it in the middle.
Washing and Care
Wash the finished quilt in cold water on gentle, a bathtub soak is gentlest for a first wash, to check for dye issues across 80 different fabrics.
Dry flat or tumble low; cotton batting shrinks slightly (2–3%) on first wash, which creates the beloved crinkled “antique” texture of hand-quilted pieces. That’s a feature. Store folded with acid-free tissue in the folds, refolding along different lines every few months so creases don’t become permanent. A hand-quilted throw, cared for simply, will outlive you, mine is earmarked for my niece.
Related guides
Table Runner Embroidery for Beginners — for a table runner in the same style; Kantha Stitch Guide for Beginners — for kantha stitching on quilts.
Frequently Asked Questions
How long does a hand-stitched quilt really take?
For this 120 × 150 cm throw: 2 weekends for the top, 1 day for basting, 35–50 hours of hand quilting (6–14 weeks of evenings), half a day for binding. Total: 3–5 months of relaxed evening work. It’s a season, not a weekend — plan for that and enjoy it.
Can I really hand-quilt without a frame?
A 35–45 cm hoop works for sections, but for a quilt this size a frame (even a simple PVC pipe frame, ~PKR 1,500 in materials) keeps the whole sandwich taut and saves your lap. I quilted my first throw with a large hoop, repositioning constantly, it works, but a frame is better. Either way, never quilt without something holding tension.
My stitches are uneven. Should I unpick and redo?
Only if they’re wildly inconsistent. Slight variation is the signature of hand quilting, it’s literally what distinguishes it from machine work. Aim for consistency within each section; perfection across 50 metres is neither achievable nor desirable. My quilt’s stitching visibly improves from the centre (where I started) to the edges, and I love that it records my learning.
What if I run out of a fabric mid-project?
It happens, dye lots differ and shops sell out. Substitute a close coordinate rather than stalling; in a scrappy patchwork of 5–8 fabrics, one substitution is invisible. This is also why I recommend buying 10% more than calculated for your feature fabrics.
Is hand quilting bad for your hands?
It can strain them if you marathon. Take breaks every 30–40 minutes, stretch your fingers, keep your thimble fitted (a loose thimble makes you grip harder), and stop if anything aches sharply. I quilted through mild stiffness by shortening sessions, four months of 45-minute evenings beats six weeks of 3-hour marathons followed by a forced break.
Key Takeaways
- A 120 × 150 cm throw with 15 cm squares (80 pieces) is the ideal first hand-quilted project.
- Invest in a rotary cutter set and low-loft cotton batting; use proper quilting thread, not sewing thread.
- Practice the rocking stitch on a scrap sandwich for a week before touching the real quilt.
- Prioritise even stitches over small stitches — consistency is what reads as skill.
- Baste with pins every 10–12 cm and quilt from the centre outward.
- Budget a season, not a weekend: 3–5 months of evening stitching is normal and wonderful.
Four months, eighty squares, roughly fifty metres of stitching, one finished quilt. When I spread it on the sofa and sat under it for the first time, the warmth felt different from any blanket I’d owned, not just thermal, but historical. Every stitch was an evening I chose slowness over speed. That’s what a hand-stitched quilt is: time, made tangible, that keeps you warm.


