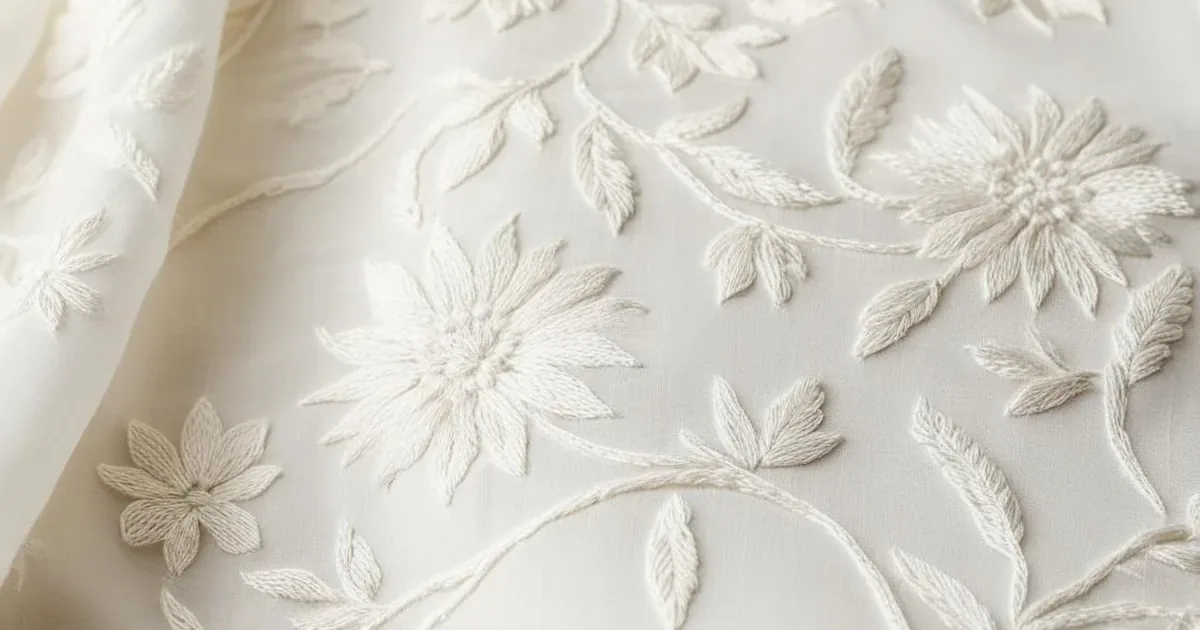
Chikankari Embroidery Guide
I learned chikankari backwards. My first encounter was a machine-made kurta from a high-street brand, pretty from three feet away, flat and lifeless up close. Then a friend’s grandmother in Lahore showed me her own wedding dupatta, and the difference stopped me mid-sentence.
Real chikankari has shadow. The stitches sit slightly raised, the thread catches light differently from every angle, and on sheer fabric you can see the pattern ghosting through to the back like a watermark. No machine has ever faked that. This guide is about the hand craft: the stitches, the fabrics, and how to start without ruining good muslin.
Chikankari is the white-on-white (or tone-on-tone) hand embroidery of Lucknow, and it’s one of the most technically demanding embroideries in South Asia, not because any single stitch is hard, but because the whole system only works when a dozen small decisions are right at once.
Get it right and the result looks like carved ivory. Get it wrong and it looks like a crumpled napkin.
What Chikankari Is — and Isn’t
At its simplest, chikankari is shadow-work embroidery: stitches worked on fine, often sheer cotton (muslin, mulmul, voile, organza, chanderi) that create texture and pattern through thread density rather than color. The classic look is white thread on white fabric, though contemporary pieces use pastels and tone-on-tone color.
What it isn’t: printed or machine-embroidered “chikankari style.” The hand craft is built from a family of named stitches — bakhea (shadow work), phanda and murri (grain-like knots), keel kangan, hool (eyelet), zardozi-adjacent embellishments in finer pieces, and flat stitches like taipchi, combined in a single design the way a musician combines notes.
A genuine piece will show several stitch types in one motif. That variety is your authenticity test.
A note on origins, kept honest: Lucknow’s workshops trace the craft through Mughal-era patronage, and the stitch repertoire clearly absorbed Persian and Central Asian influences.
What matters for you as a maker is not the courtly history but the workshop logic that survives in it, chikankari was a production craft with specialized roles (designer, block-printer, stitcher, washer), and each role’s habits are embedded in the technique.
Fabric First: The Ground Decides Everything
Chikankari lives or dies on fabric choice. The ground must be fine enough for the shadow effect, stable enough to hold dense stitching, and light enough that the raised stitches read against it. My tested shortlist:
| Fabric | Best for | Difficulty |
|---|---|---|
| Cotton muslin / mulmul | Learning; dupattas, kurtas | Beginner-friendly |
| Cotton voile | Fine garments; crisp shadow work | Intermediate, shifts in the hoop |
| Chanderi / cotton-silk | Dressier pieces | Intermediate, slippery |
| Organza | Hoop art, overlays | Advanced — unforgiving of mistakes |
| Fine lawn | Everyday wearables | Beginner-friendly |
Whatever you choose, pre-wash it exactly as you will wash the finished piece, and press it. Fine cottons shrink, and chikankari’s dense stitching will pucker a ground that moves underneath it. I also starch lightly before hooping, a little body in the fabric makes accurate stitching dramatically easier, and it washes out later.
The Stitch Family
You don’t need all twelve traditional stitches to start. You need four, and you need them clean.
1. Taipchi — the running foundation
A simple running stitch worked along the design outline. It looks humble, but taipchi does the structural work: it defines every shape the fancier stitches will fill.
Work it small and even, uneven taipchi telegraphs through everything built on top of it. I make students stitch a full page of taipchi lines before touching any other stitch. It’s the scales before the sonata.
2. Bakhea — shadow work
The signature stitch. Bakhea is worked on the wrong side of sheer fabric: a herringbone-style stitch whose threads show through to the front as a soft shadow.
This is the stitch that gives chikankari its watermark quality. The trick is absolute regularity, the shadow only reads as a clean shape if every stitch is the same length and spacing. On opaque fabric the effect is lost, which is why sheer grounds matter.
3. Phanda and Murri — the grains
These are the raised dot stitches, small, tight French-knot-like grains that form flower centers, fruit clusters, and textured fills. Phanda is the smaller millet-grain; murri the larger rice-grain.
They are worked with the thread wrapped around the needle, and the difference between a crisp grain and a mushy blob is exactly one wrap and a firm (not strangling) pull. Practice on a scrap until you can make twenty identical grains in a row.
4. Hool — the eyelet
A small hole punched in the fabric and bound with buttonhole stitch — used for flower centers and ventilation-like decorative dots. Hool requires confidence: you are deliberately piercing the ground. Use a stiletto or awl, never scissors, and bind immediately before the hole distorts.
Beyond these, the repertoire includes keel kangan (a flat petal stitch), jaali (drawn-thread openwork, advanced), and zardozi accents on bridal pieces. Learn the four above first; they carry 80% of classic designs.
Transferring the Design
Traditional workshops print designs with carved wooden blocks and fugitive blue ink. At home, you have better options:
- Water-soluble pen on light fabric: my default for white-on-white. Test that it truly washes out of your exact fabric first, on some mulmuls, “washable” blue leaves a ghost.
- Light pencil or tailor’s chalk: for opaque grounds where a pen might show.
- Tracing with a lightbox: draw your design on paper, then trace onto hooped fabric. Best for precise geometric layouts.
- Printer transfer (cold): print mirrored, press with a hot iron, test on scraps; some inks set permanently with heat.
Keep the design open and airy at first. Beginners always draw too densely; dense chikankari on a first project puckers, and unpicking white thread from white fabric is a special kind of suffering.
Step-by-Step: A Phanda Flower Motif
A classic beginner motif: a six-petal flower with a phanda center, outlined in taipchi, about 4 cm across. Work it on hooped, lightly starched muslin with two strands of white cotton floss.
Step 1 — Mark and outline
Transfer a simple six-petal flower. Outline every petal and the center circle in taipchi, keeping stitches 2–3 mm long and even. This outline is your scaffolding, take your time.
Step 2 — Fill the center
Work the center circle solid with phanda grains: bring the needle up, wrap the thread twice around the needle, hold the wraps taut, and take the needle down very close to (not in) the entry hole. Pack the grains tightly with no ground showing. Aim for uniformity over speed.
Step 3 — Petal texture
Fill each petal with a second row of taipchi inside the outline, or leave petals as clean outlines with a phanda-tipped end — both are traditional treatments. For your first motif, outlined petals with a solid phanda center is the classic, forgiving combination.
Step 4 — Finish like a professional
End threads on the wrong side with tiny woven backs, never knots, knots show through sheer fabric as lumps. Press from the wrong side on a padded surface. Wash gently to remove markings, dry flat, press again. The motif should sit slightly raised, casting a faint shadow.
Common Beginner Mistakes
| Mistake | Why it happens | Fix |
|---|---|---|
| Puckering around dense areas | Fabric too loose in hoop; stitches too tight | Re-hoop drum-tight; ease tension; starch the ground |
| Uneven phanda grains | Inconsistent wraps, varying pull | Always two wraps; anchor the wrap with your non-needle thumb |
| Design markings won’t wash out | Wrong pen for the fabric; heat-set accidentally | Test pens on scraps; never iron before washing markings out |
| Thread shadows through sheer fabric | Carrying thread across the back | End and restart; never carry on sheers |
| Flat, lifeless result | Stitches too small/tight; no raised elements | Include phanda/murri; let stitches sit proud of the surface |
Washing and Care
Hand wash in cool water with mild soap. Never wring, press water out in a towel. Dry flat in shade; direct sun yellows white cotton over time.
Iron from the wrong side on a thick towel so the raised stitches aren’t crushed. Store whitework wrapped in washed muslin, not plastic, and never store it even slightly damp, mildew is the quiet killer of heirloom whitework.
Takeaways
- Chikankari is a system of stitches (taipchi, bakhea, phanda/murri, hool), not one stitch, learn four well before chasing the full dozen.
- Fabric choice is half the craft. Fine, pre-washed, lightly starched cotton muslin or lawn is the honest beginner ground.
- Work clean: no knots, no carried threads on sheers, markings that truly wash out.
- Shadow work (bakhea) only works on sheer fabric — match the stitch to a ground that can show it.
- Density is earned: start with open designs; dense stitching without control puckers.
Related guides
Phulkari Embroidery: Complete Technique Guide — for phulkari, another regional embroidery; Shisha (Mirror) Work Step-by-Step — for mirror work to pair with whitework.
Frequently Asked Questions
How is chikankari different from other whitework?
Most European whitework (like broderie anglaise) is built on cutwork and drawn thread. Chikankari is primarily surface stitching (the pattern comes from stitch texture and shadow rather than removed fabric) though it does include a drawn-thread jaali in advanced pieces.
Can I use an embroidery machine for chikankari?
Machines can imitate the look, but the hand qualities (the slight lift of phanda, the true shadow of bakhea through sheer cloth) don’t survive mechanization. If you want to learn the craft, learn it by hand; the machine version is a different product.
What thread is best for white-on-white?
Stranded cotton (two strands) for learning; fine cotton floss or mulmul thread for authentic pieces. Avoid polyester — it has a plastic sheen that reads as cheap against matte cotton, and it doesn’t age the way cotton does.
Why does my shadow work look muddy?
Usually three causes: fabric too opaque, stitches irregular, or thread too thick. Switch to a sheerer ground, slow down for evenness, and drop to two strands. Shadow work is unforgiving of shortcuts, that’s why it commands respect.
How do I price or value hand chikankari?
Count your hours honestly, including design transfer and finishing. A hand-embroidered kurta panel represents days of skilled work, price it like the craft it’s, not like its machine imitation. Underpricing handwork hurts every artisan in the chain.


