Smocking Guide
The first smocking I ever saw up close was on a child’s dress at a family wedding — honeycomb stitching across the yoke in white thread on white lawn, stretching as the kid ran and snapping back into perfect pleats.
I spent the whole event trying to figure out how thread could behave like elastic. Nobody at my table could explain it. It took me two years and three ruined yokes to learn what that embroiderer knew in her hands: smocking isn’t decoration applied to gathered fabric. It’s engineering, the stitches are what create and control the gather, and the pattern of the stitches decides exactly how the fabric moves.
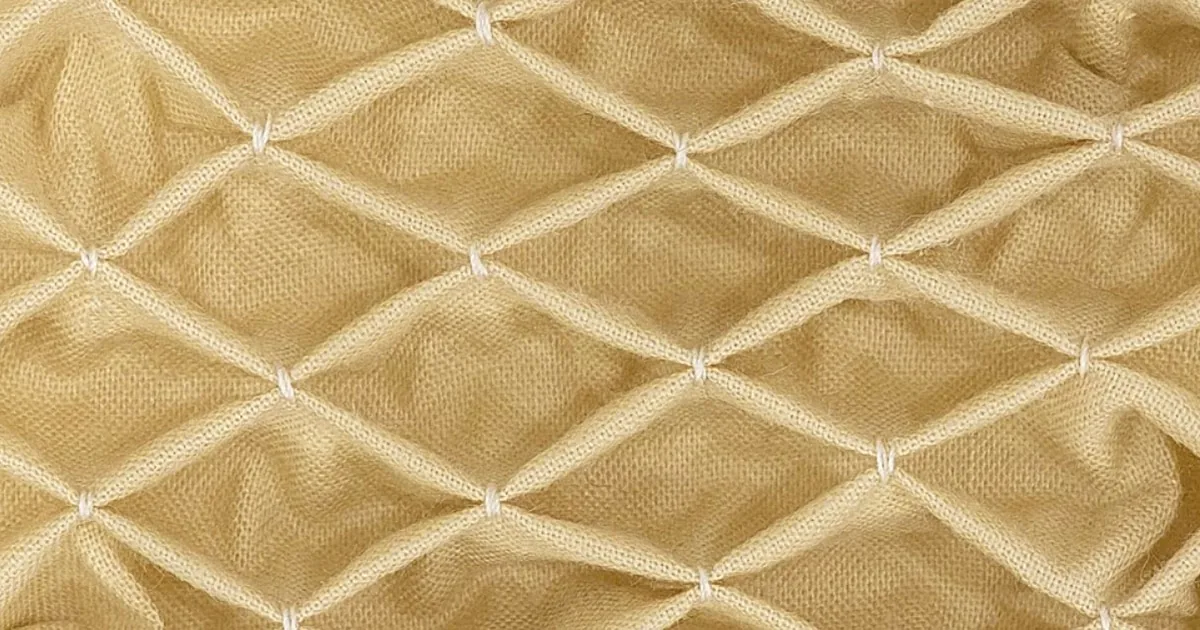
Smocking is embroidery worked over pleated or gathered fabric to create stretch, texture, and pattern simultaneously.
Before elastic existed, it was how cuffs, necklines, and bodices were made to flex. Today it survives as one of the most beautiful intersections of structure and ornament in needlework, and it’s far more approachable than its intricate appearance suggests.
What Smocking Does
At its core, smocking does three jobs at once:
- It creates controlled elasticity. The stitches hold folds of fabric in a lattice that stretches when pulled and recovers when released, mechanical stretch from thread geometry, no elastic required.
- It creates texture. The regular pleats catch light and shadow, giving even plain fabric a rich, dimensional surface.
- It creates pattern. Different stitch combinations produce honeycomb, diamonds, waves, cables, and trellis designs, the pattern is the structure.
Understanding this triple function is what separates smocking from “gathering with pretty stitches on top.” Every stitch you place is structural. Skip stitches or place them irregularly and the fabric won’t gather evenly — the pattern and the engineering fail together.
The Two Approaches: Pleater vs. Hand Gathering
| Pleater machine | Hand gathering (dots/transfer) | |
|---|---|---|
| How it works | Fabric fed through a pleater that pleats it evenly onto threads | Rows of gathering stitches sewn by hand on marked dots, then drawn up |
| Evenness | Near-perfect, automatic | Depends on your marking accuracy |
| Cost | Significant investment (or borrow one) | Free, just thread and a ruler |
| Best for | Garment quantities; fine fabrics; heirloom sewing | Learning; small projects; occasional smocking |
Start with hand gathering. A pleater is wonderful but it’s a commitment; hand-gathered smocking teaches you to see the pleat structure, which makes you better even if you buy a pleater later. All the instructions below assume hand gathering.
Materials
- Fabric: lightweight, stable wovens, cotton lawn, voile, fine gingham (the checks double as a marking grid!), chambray. Avoid slippery fabrics (satin, silk) for your first project and avoid heavy fabrics entirely, smocking needs to fold crisply.
- Thread: stranded cotton floss or perle cotton. Traditional English smocking often uses the fabric’s own color for subtlety; contrasting thread shows the pattern boldly. For learning, use a contrasting color, you need to see what you’re doing.
- Needle: a sharp crewel or embroidery needle that passes easily through the pleat folds.
- Marking: a water-soluble pen and ruler, or iron-on smocking transfer dots. Accuracy here determines everything downstream.
Fabric math
Smocking consumes fabric at roughly 3:1 — three widths of fabric gather down to one width of finished smocking.
For a yoke that finishes 25 cm wide, cut 75 cm of fabric. (Fine pleats on light fabric can go to 2.5:1; deep patterns may need 3.5:1.) Always cut generously; you can trim excess, but you can’t add width back.
Preparation: Marking and Gathering
Step 1 — Mark the grid
On the wrong side of your fabric, mark rows of dots: rows spaced about 1 cm apart vertically, dots spaced about 1 cm apart horizontally, covering the area to be smocked plus margin. Use a ruler, eyeballing the grid is the #1 cause of wavy smocking. For gingham, skip marking: the checks are your grid.
Step 2 — Gather the rows
Thread a strong hand-sewing thread (or two strands of floss), knot the end, and run a gathering stitch along each row of dots, picking up each dot.
When all rows are threaded, pull each gathering thread to draw the fabric into even pleats, spacing the pleats by eye, and knot the threads temporarily. The pleated panel should measure your target finished width.
Step 3 — Secure and steam
Tie off the gathering threads (don’t cut them yet, they stay until the smocking is complete). Steam-press the pleats gently to set them. Now you have a pleated panel ready for the decorative/structural stitching. This preparation is half the craft; don’t rush it.
The Core Stitches
All smocking stitches are worked on the right side, catching the peaks of the pleats. The needle travels horizontally, picking up one fold at a time.
Outline stitch (the cable’s foundation)
The basic building block: bring the needle up at the left edge of a pleat, take it across to the next pleat keeping the thread above the needle, and pull through.
Each stitch binds two adjacent pleat-peaks together. A row of outline stitches with the thread held consistently above (or below) the needle creates the ridged cable stitch, alternate above/below for a zigzag effect.
Honeycomb stitch
The classic: work two rows of outline stitch, but on the second row, pick up the opposite pleat pairings, this pulls the pleats into the characteristic hexagonal honeycomb cells. Honeycomb gives the most stretch of the common stitches and the most recognizable smocked look. If you learn one stitch, learn this one.
Diamond / trellis
Outline stitches worked in diagonal sequences that cross to form diamonds. More decorative, slightly less stretch than honeycomb — beautiful for yoke panels where the pattern is the point.
Wave stitch
The thread travels in a wave, dipping to catch lower pleats and rising over upper ones. Creates flowing horizontal waves, lovely as a border row between geometric patterns.
French knots and bullion accents
Worked on the pleat peaks as decoration after the structural stitching. They don’t contribute to the gather, they’re jewelry on the engineering.
A Beginner Project: Smocked Cushion Panel
Before committing to a garment yoke, smock a 20 × 20 cm panel for a cushion front. It teaches the full process with zero fitting pressure.
- Cut a 60 × 30 cm rectangle of cotton lawn (3:1 width ratio for a 20 cm finish, plus seam allowances).
- Mark a dot grid on the wrong side: 1 cm spacing, covering a 22 × 22 cm area centered on the fabric.
- Gather every row, draw up to 20 cm wide, knot, and steam.
- Smock in honeycomb: work 6–8 rows of honeycomb stitch across the panel in a contrasting thread.
- Finish with a row of wave stitch top and bottom as a border, then remove the gathering threads.
- Mount on a cushion front, back it with a plain panel so the smocking’s texture shows without distortion.
When you can produce an even honeycomb panel with straight edges and uniform cells, you’re ready for a garment yoke.
Troubleshooting
| Problem | Cause | Fix |
|---|---|---|
| Wavy, uneven pleats | Inaccurate marking or uneven gathering | Re-mark with a ruler; re-gather, measuring pleat depth |
| Smocking won’t stretch | Stitches pulled too tight; wrong stitch for the job | Ease tension; honeycomb stretches most, use it where flex matters |
| Pattern drifts diagonally | Picking up wrong pleats; losing count | Count pleats per stitch (usually 2); mark every 10th pleat |
| Edges flare out | Edge pleats not secured | Work a stabilizing row of outline stitch at each edge |
| Thread breaks mid-row | Thread too long; abrasion through pleat folds | Shorter lengths (40 cm); wax the thread |
Care
Hand wash smocked garments — machine agitation distorts the pleat structure over time. Dry flat, reshaping the smocked area with your fingers while damp. Never press smocking flat with an iron; steam from a distance if needed, letting the texture spring back. Stored folded, not hung, hanging stretches the smocked panel under its own weight.
Takeaways
- Smocking is structural: the stitches create the gather, the stretch, and the pattern simultaneously.
- Start with hand gathering on a marked grid, accuracy in marking determines everything.
- Budget fabric at 3:1 (three widths gather to one).
- Learn honeycomb first, it’s the most versatile and most forgiving stitch.
- Practice on a cushion panel before a garment yoke; keep smocking out of the dryer and off the hanger.
Related guides
Appliqué Techniques for Handmade Garments — for appliqué, another fabric-manipulation technique; Blackwork Embroidery — for blackwork.
Frequently Asked Questions
Do I need a pleater to learn smocking?
No. Hand gathering on a marked dot grid teaches the same structure and costs nothing. Pleaters earn their keep when you’re smocking garment quantities regularly, learn by hand first, then decide.
What fabrics work for smocking?
Lightweight stable wovens: cotton lawn, voile, gingham, chambray. The fabric must pleat crisply and hold a crease. Avoid knits (they don’t pleat), slippery fabrics, and anything heavy.
Can smocking be done by machine?
Shirring with elastic thread mimics the effect of smocking (gathered stretch fabric) but it’s a different technique with a different look — no decorative stitch pattern. True smocking is hand work.
Why is my smocking puckering instead of pleating?
Usually the gathering rows weren’t drawn up evenly, or the fabric is too heavy/light for the spacing. Re-do the gathering with measured, even pleats before stitching a single decorative stitch, structure first, always.
How do I add smocking to an existing pattern?
Cut the yoke/bodice piece at 3× the pattern width for the smocked section, smock it to the pattern’s finished width, then treat the smocked panel as your pattern piece. Interface the seam allowances to stabilize where smocking meets plain fabric.


