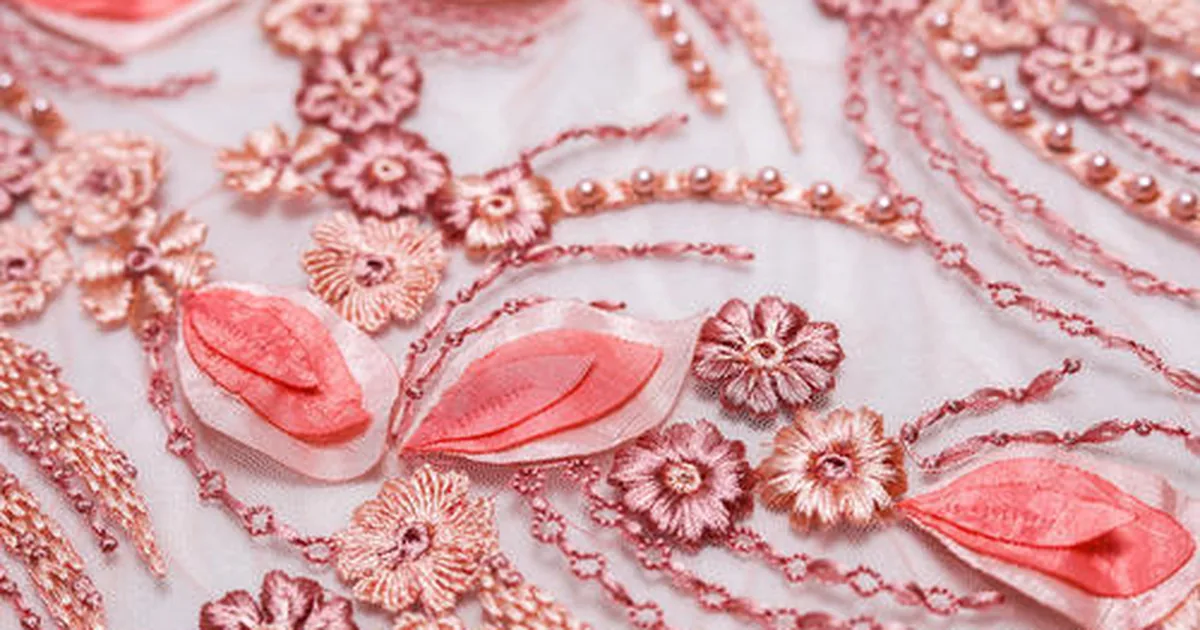
Appliqué Techniques for Handmade Garments
The appliqué that converted me was a repair, not a decoration. A favorite kurta had a cigarette-burn hole near the hem, small, but exactly where the eye lands.
I cut a paisley from a contrasting lawn scrap, stitched it over the damage with a tight buttonhole edge, and the kurta came back better than it had been. That’s appliqué’s secret identity: it’s embroidery’s most practical technique. Decoration, reinforcement, and repair in a single method, and the fastest way to put bold, graphic design onto a handmade garment.
Appliqué is the technique of cutting shapes from one fabric and stitching them onto another. The shapes can be pictorial (flowers, animals), geometric, or abstract; the attachment can be invisible or a featured design element.
It appears in folk traditions worldwide — from Hawaiian quilt appliqué to Rajasthani gota-adjacent cloth work to the reverse appliqué of the Kuna people, and in contemporary slow fashion as the go-to method for visible mending and upcycling. Below, the methods that actually work on garments, not just wall hangings.
The Three Families of Appliqué
| Method | How it works | Best for |
|---|---|---|
| Raw-edge appliqué | Shape cut and stitched with edges exposed; edge finished with satin stitch, blanket stitch, or left to fray decoratively | Bold graphic designs; denim; children’s clothes |
| Turned-edge appliqué | Seam allowance folded under before stitching; edge sewn with invisible slip stitch | Fine garments; heirloom look; smooth curves |
| Reverse appliqué | Top fabric is cut away to reveal layers beneath; edges finished with stitching | Dramatic layered effects; molas; statement panels |
For handmade garments, raw-edge and turned-edge cover nearly everything. Reverse appliqué is spectacular but structurally demanding, save it for panels and yokes, not stress areas.
Fabric Pairing: What Sticks to What
Appliqué fails most often at the pairing stage, before a single stitch is sewn. The rules:
- Match fiber behavior. Cotton on cotton, linen on linen. A polyester shape on a cotton ground will pucker differently in the wash and eventually look quilted in the wrong way.
- Match weight roughly. A heavy denim patch on fine voile drags and distorts; a voile patch on denim disappears. Keep ground and appliqué within one weight class.
- Pre-wash everything. Both ground and appliqué fabrics, in the hottest wash the finished garment will ever see. Differential shrinkage is the #1 cause of puckered appliqué.
- Consider fray. Loosely woven appliqué fabrics fray at raw edges, either plan for it (decorative fray is a legitimate finish) or seal edges with turned-under allowances or fusible web.
Fusible web: the modern helper
Iron-on fusible web (the paper-backed adhesive sheets) bonds the appliqué shape to the ground before stitching. It prevents shifting, eliminates pinning on tricky curves, and adds a little body.
Use the sewable variety, non-sewable web gums up needles. And know its limits: fusible is an aid, not the attachment. Always stitch the edges; adhesive alone will not survive real garment laundering.
Method 1: Raw-Edge Appliqué with Satin-Stitch Finish
The workhorse method — fast, bold, durable. The shape’s cut edge is covered by dense stitching that both decorates and seals.
Step 1 — Prepare the shape
Trace your design onto the appliqué fabric (reversed if the design is directional). Cut precisely on the line, the stitching will sit right at this edge, so ragged cutting shows. Apply fusible web to the wrong side before cutting if you’re using it.
Step 2 — Position and baste
Fuse or baste the shape to the garment. Step back and look at placement in a mirror, appliqué placement errors are the most common regret I see. A motif 2 cm too low ruins the line of a neckline.
Step 3 — Stitch the edge
Set your machine to a dense satin stitch (or work blanket stitch by hand for a folk look).
Stitch around the entire shape with the needle catching just past the raw edge, the stitching should swallow the edge completely. On curves, slow down and pivot; on points, stitch to the tip, pivot with the needle down, and continue. Overlap the start and end by a few stitches.
Step 4 — Finish
Trim any thread tails, press from the wrong side, and wash-test a scrap sandwich first if this is a new pairing. The satin-stitched edge should feel smooth, with no raw edge peeking out.
Method 2: Turned-Edge Appliqué (Needle-Turn)
The heirloom method, invisible, elegant, entirely hand-sewn. The seam allowance is turned under as you stitch, so no raw edge ever shows.
Step 1 — Cut with allowance
Cut the shape with a 6 mm seam allowance all around. Clip curves (notch outward curves, clip inward curves) so the allowance turns smoothly.
Step 2 — Needle-turn as you go
Using the tip of your needle, turn under a 2–3 cm section of allowance and hold it with your thumb. Slip-stitch the folded edge to the ground with tiny, nearly invisible stitches, turning the next section as you advance. Work with the garment in a hoop if the area allows.
Step 3 — Points and curves
At outward points, fold one side then the other to miter; at inward points, clip to the stitching line. Take your time here — points are where needle-turn appliqué is judged.
Needle-turn is slower than raw-edge by a factor of three or four, but the result is a garment that looks made rather than decorated. For bridal, formal, and heirloom pieces, it’s worth every minute.
Method 3: Reverse Appliqué Basics
Layer 2–3 fabrics, stitch your design through all layers, then cut away the top layer(s) inside the stitched lines to reveal the colors beneath. The famous molas of the Kuna people use many layers and extraordinary precision; your first attempt should use two layers and a simple bold shape.
- Baste layers together thoroughly, shifting ruins reverse appliqué.
- Stitch the design lines with small, strong stitches (hand backstitch or tight machine straight stitch).
- Cut the top layer inside the stitching line with small sharp scissors, leaving 3 mm. Then finish the cut edge with tiny whip stitches or leave clean if the fabric doesn’t fray.
- Never cut the bottom layer. Cut with the work held up to light so you can see the layers.
Appliqué on Real Garments: Placement and Engineering
| Garment zone | Appliqué suitability | Notes |
|---|---|---|
| Neckline / yoke | Excellent | High visibility, low stress; the classic placement |
| Cuffs | Good | Keep motifs small; cuffs take abrasion |
| Hem borders | Excellent | Repeating motifs shine here; mind the hem allowance |
| Elbows / knees | Functional (patching) | Use turned-edge or reinforced raw-edge; this is repair territory |
| Seat / stress seams | Avoid | Flexing and friction destroy appliqué; embroider nearby instead |
| Children’s clothes | Excellent (raw-edge) | Soft edges only; no beads; secure ends obsessively |
Design tips from the worktable
- Scale to the garment. A motif that looks great on a cushion can look lost on a kurta or overwhelming on a child’s shirt. Cut paper templates and pin them on before committing.
- Limit your palette. Two or three fabrics plus the ground is the sweet spot; more reads as scrap-bag unless the chaos is the concept.
- Echo garment lines. Appliqué that follows a neckline curve or hem looks designed; appliqué floating randomly looks stuck-on.
- Mind the back. On unlined garments, the appliqué’s stitching shows inside. Keep backs tidy, trim tails, and consider a lightweight facing over large appliquéd areas.
Mistakes to Avoid
- Skipping the pre-wash. The single most common cause of puckered appliqué. Wash both fabrics first. Always.
- Fusible-only attachment. Adhesive without stitching fails in the wash. Stitch every edge.
- Wrong needle for the sandwich. Thick appliqué stacks need a jeans or topstitch needle; a universal needle will skip and break.
- Stretching the ground while stitching. Hoop or stabilize; a distorted ground never recovers.
- Forgetting wearing ease. Dense appliqué stiffens fabric, don’t appliqué across areas that need to stretch or drape over curves unless you’ve tested the effect.
Care
Wash appliquéd garments inside-out on gentle, in cool water. The stitching protects the edges, but agitation is the enemy of dimensional work.
Press from the wrong side on a padded surface; for heavily textured appliqué, steam from a distance rather than pressing flat. Inspect edges annually, a few reinforcing stitches now prevent a peeling patch later.
Takeaways
- Appliqué = fabric shapes stitched onto fabric: raw-edge (bold, fast), turned-edge (invisible, heirloom), reverse (layered, dramatic).
- Pair fabrics by fiber and weight, and pre-wash everything before cutting.
- Fusible web is positioning aid, not attachment, stitch every edge.
- Place appliqué where it will be seen but not stressed: yokes, necklines, hems, cuffs.
- It’s also the best visible-mending technique in this series — a burn, tear, or stain becomes a design feature.
Related guides
Smocking Guide — for smocking, another fabric-manipulation technique; Needles, Hoops & Frames: Complete Tool Guide — for the tools appliqué needs.
Frequently Asked Questions
Can I appliqué by hand if I don’t own a sewing machine?
Absolutely, turned-edge needle-turn appliqué is entirely hand-sewn and predates machines by centuries. Raw-edge can also be finished by hand with blanket stitch. The machine only adds speed, not quality.
Will appliqué survive regular machine washing?
Yes, if edges are properly stitched (satin stitch or dense blanket stitch all around) and fabrics were pre-washed. Wash inside-out on gentle. Fusible-only appliqué will not survive, stitching is the structure.
What’s the best stitch for raw edges by hand?
Blanket (buttonhole) stitch, worked densely so each stitch bites just past the raw edge. It’s the traditional hand finish and it’s genuinely durable, it both seals and decorates.
Can appliqué cover a stain or hole?
That’s one of its finest uses. Cut the patch generously larger than the damage, stabilize thin or weakened ground fabric behind it first, and appliqué over. A stain becomes invisible; a hole becomes a motif.
How do I stop lightweight appliqué fabric from fraying?
Three options: turned-under edges (best), a narrow zigzag or pinking on the cut edge before stitching, or a light fusible interfacing on the appliqué’s wrong side for body (heat-tolerant fabrics only; avoid on silk, heat-sensitive, or valuable textiles). For decorative fray, cut on-grain and pull threads to a controlled fringe, then it’s a feature, not a failure.


