Pattern Transfer Methods Compared
Every embroidery project begins with the same quiet moment: a blank piece of fabric and a design that needs to get onto it accurately.
I’ve used every transfer method here across hundreds of projects, and I can tell you there’s no single best one, there’s only the best one for your fabric, your design, and your patience level. Here’s an honest comparison so you can choose well the first time.
Why Transfer Method Matters
A bad transfer haunts the whole project. Lines too thick show beside your stitches. Lines that won’t wash out ruin light fabrics. A distorted transfer means a distorted design no matter how perfect your stitching is. Ten careful minutes at this stage saves hours of regret later.
The Seven Methods, Compared
| Method | Best for | Accuracy | Removability | Cost |
|---|---|---|---|---|
| Lightbox / window tracing | Light, thin fabrics | Excellent | Depends on pen used | Low |
| Water-soluble transfer pens | Light & medium fabrics | Excellent | Washes out fully | Low |
| Heat-erasable (Frixion-type) pens | Light & medium fabrics | Excellent | Iron or hairdryer removes | Low |
| Dressmaker’s carbon paper | Medium & dark fabrics | Good | Brushes/washes out mostly | Low |
| Prick and pounce | Dark, textured, velvet | Good | Powder brushes away | Low (time: high) |
| Iron-on transfer pencils/paper | Light cottons, multiples | Very good | Permanent, must cover fully | Medium |
| Water-soluble stabilizer (printed) | Any fabric incl. dark/knits | Excellent | Dissolves in water | Medium |
Method by Method: What It’s Really Like
1. Lightbox or window tracing
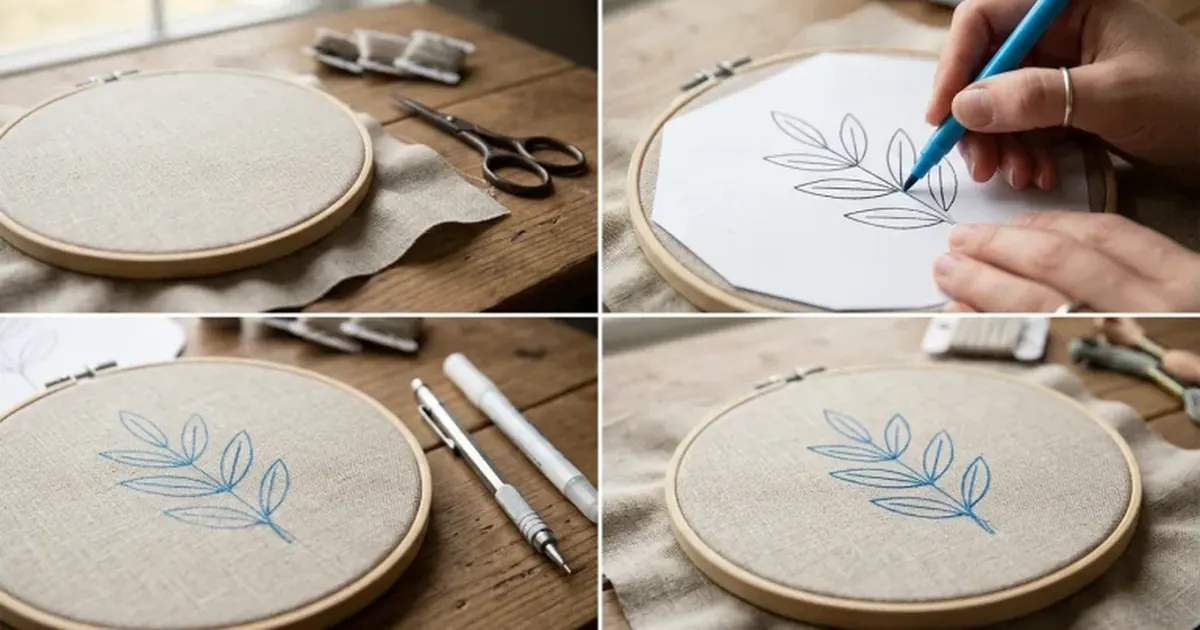
Tape your design to a lightbox (or a sunny window), lay the fabric over it, and trace with your chosen pen. It’s fast, accurate, and free if you use a window. The limitation is fabric: anything too dark or thick to see through defeats it. For light cottons and linens, this is my default.
2. Water-soluble transfer pens
These blue or purple pens draw crisp lines that vanish completely in water. Wonderful, with two caveats from experience.
First, don’t iron over the marks before washing; heat can set some brands permanently. Second, on some fabrics the lines reappear if the piece gets damp later (a known quirk), so always rinse the finished piece thoroughly. Test your pen on a scrap first.
3. Heat-erasable pens
These vanish with the heat of an iron or hairdryer, which makes them brilliant for projects you don’t want to wash.
The catch: the marks can return in cold temperatures (yes, really — the chemistry is reversible), and they’re not recommended for anything that will be dry-cleaned or exposed to heat unexpectedly. I use them for wall hangings and items that stay indoors, never for garments.
4. Dressmaker’s carbon paper
Place the carbon between your design and fabric, trace over the lines with a stylus, and the design transfers. It works on dark fabrics where pens fail, and it’s cheap.
Downsides: lines can be thick and waxy, they don’t always wash out completely from light fabrics, and pressing hard can emboss the fabric. Use light pressure and choose the carbon colour closest to your thread.
5. Prick and pounce
The traditional method: prick holes along your design lines, lay the perforated paper on the fabric, and pounce powdered chalk through the holes.
It’s the best option for velvet, dark wool, and textured fabrics where nothing else works. It’s also slow and the powder lines are fragile, handle the fabric gently after pouncing and stitch promptly. I reserve it for special pieces.
6. Iron-on transfer pencils and paper
Draw or print your design with special transfer material, iron it onto the fabric, and stitch over the lines.
Great for repeating a design many times (a production run of embroidered motifs). The critical warning: transferred lines are permanent. Your stitching must cover every line completely, so this method suits filled designs, not delicate line work.
7. Water-soluble stabilizer (printable)
Print or trace your design onto water-soluble stabilizer, baste or stick it to the fabric, stitch right through it, then rinse it away.
This is my choice for dark fabrics, stretchy knits, and anything where marking directly is difficult. It stabilizes tricky fabrics while you stitch, a genuine two-in-one. Cost is higher per project, and you must rinse thoroughly; residue left in the fibres can stiffen the finished piece.
Choosing for Your Fabric
- Light cotton/linen: lightbox tracing with a water-soluble pen. Simple, accurate, fully removable.
- Dark cotton: white water-soluble pen, dressmaker’s carbon, or stabilizer method.
- Silk: lightbox with a fine water-soluble pen; avoid carbon (waxy residue) and heat-erasable pens (silk and heat are uneasy friends).
- Velvet/corduroy: prick and pounce, or stabilizer basted on top.
- Stretch knits: water-soluble stabilizer, it prevents the design distorting as you stitch.
- Design you’ll repeat: iron-on transfer, if your stitching will cover the lines.
Mistakes I’ve Made So You Don’t Have To
- Ironing over water-soluble pen marks “just to press the fabric”, some marks set permanently. Wash first, press later.
- Using a ballpoint pen for tracing because it was handy. The ink bled into the fabric on the first wash and outlined every stitch in blue.
- Tracing with heavy pressure on carbon paper, embossing lines into the fabric that showed even after the carbon washed out.
- Assuming stabilizer had fully dissolved — the finished piece felt stiff until I soaked it a second time.
Transferring Large or Complex Designs
Big designs (a full back panel, a tablecloth centre) need extra planning. Work in sections: transfer one area, stitch it, then transfer the next, so earlier lines don’t fade or smudge while you work.
For symmetrical designs, transfer one half, then flip your template to mirror it, this guarantees true symmetry. And for designs you’ll stitch over many sessions, the stabilizer method wins for large work because the lines can’t rub off midway the way chalk or carbon can. One last tip: photograph your transferred design before you start stitching, if lines fade halfway through, the photo is your backup reference.
Key Takeaways
- Match the method to your fabric first, your design second.
- Water-soluble pens + lightbox is the best default for light fabrics; stabilizer is the best default for dark or stretchy ones.
- Never iron over soluble marks before removing them.
- Iron-on transfers are permanent, only use where stitching covers every line.
- Test every pen and paper on a scrap of your actual fabric.
Related guides
Needles, Hoops & Frames: Complete Tool Guide — for hoops and frames for transferred designs; Cross-Stitch Basics — for transferring cross-stitch charts.
Frequently Asked Questions
Which transfer method is best for beginners?
Lightbox or window tracing with a water-soluble pen on light cotton. It’s forgiving, cheap, and the marks wash out completely, so mistakes don’t matter.
Can I use a regular pencil to trace embroidery designs?
A hard graphite pencil (2H or harder) used lightly is acceptable on medium fabrics, it usually washes out. Soft pencils leave dark lines that can show through light threads. Never use ballpoint or gel pens.
Why did my heat-erasable pen marks come back?
The ink chemistry is temperature-reversible: cold can bring the marks back. Treat the marks with the heat source again to remove them, and avoid these pens on anything that might get cold in storage or shipping.
How do I transfer a design to black fabric?
White water-soluble pens, white dressmaker’s carbon, prick and pounce with light chalk, or the printable stabilizer method. Of these, stabilizer gives the crispest result on very dark fabric.


